在 Yocto 環境中調整 Linux Kernel
前言
一般來說,如果想要調整 Linux Kernel 只要在終端機輸入 make menuconfig 這類的指令就可以了。但如果在不同的開發流程中,就不是這麼單純了。
本文主要是針對 Yocto 開發流進行記錄,未來有機會的話,會再補充 buildroot 的開發方式。
主要內容
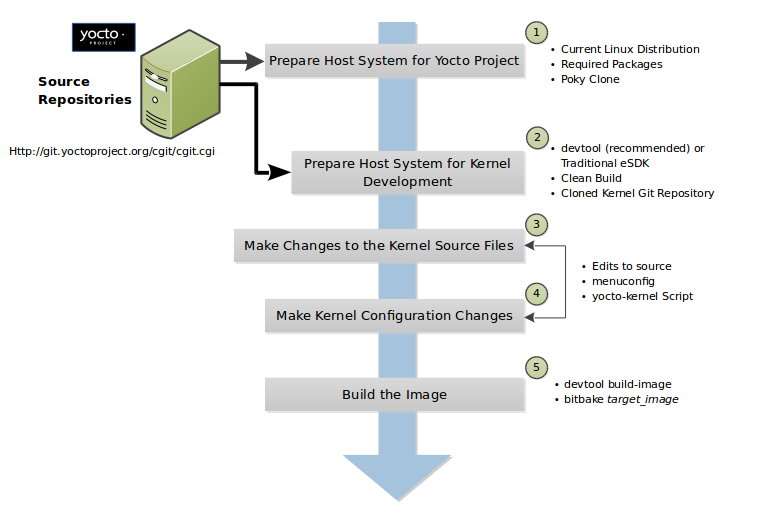
下圖取自 Yocto 官網。圖中示表了,在 Yocto 環境中開發 Kernel 時的流程
接下來的內容,筆者已初始化完 Yocto 相關的環境變數。此步驟若不清楚,可參考 這裡
找到 Kernel 來源
Kernel 的配置一般來說,都會放在 conf/machine/ 中,並且會配置 PREFERRED_PROVIDER_virtual/kernel 來指定使用的 kernel。所以我們可以直接以 */conf/machine/*.conf 來進行搜尋。
1find . -wholename "*/conf/machine/*.conf"
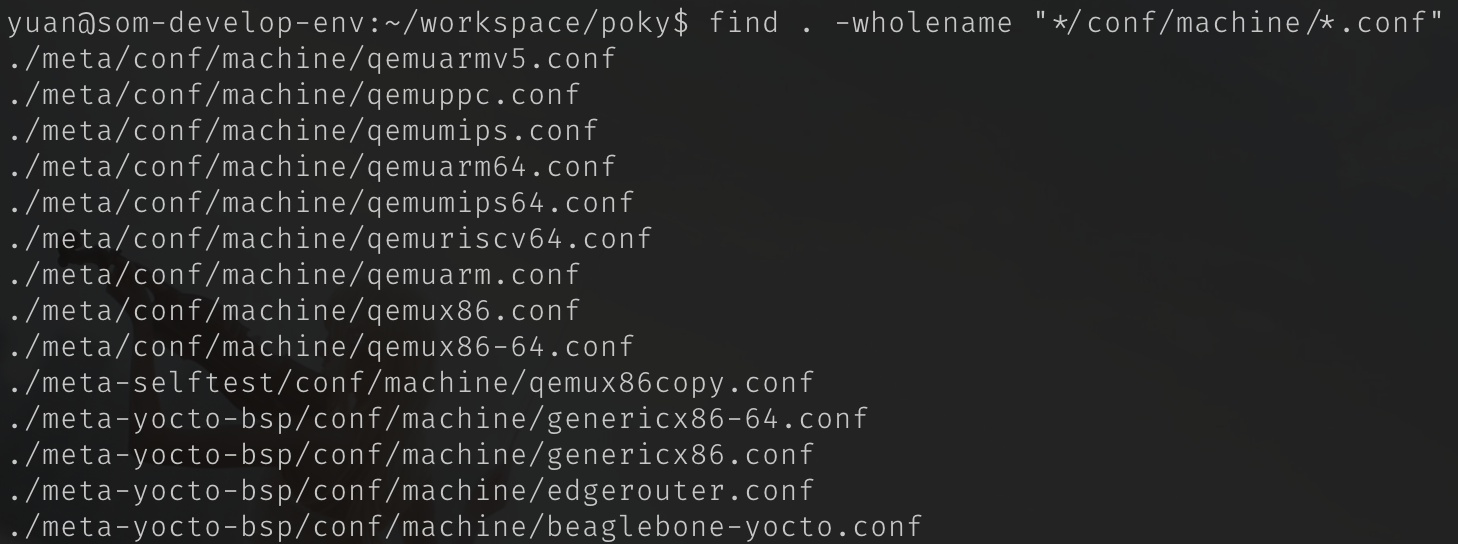
找尋 machine 配置檔
以 qemuarm.conf 為例:
在這份檔案中我們並沒有看到 PREFERRED_PROVIDER_virtual/kernel 的設定。所以我們要去查看它引入的文件。
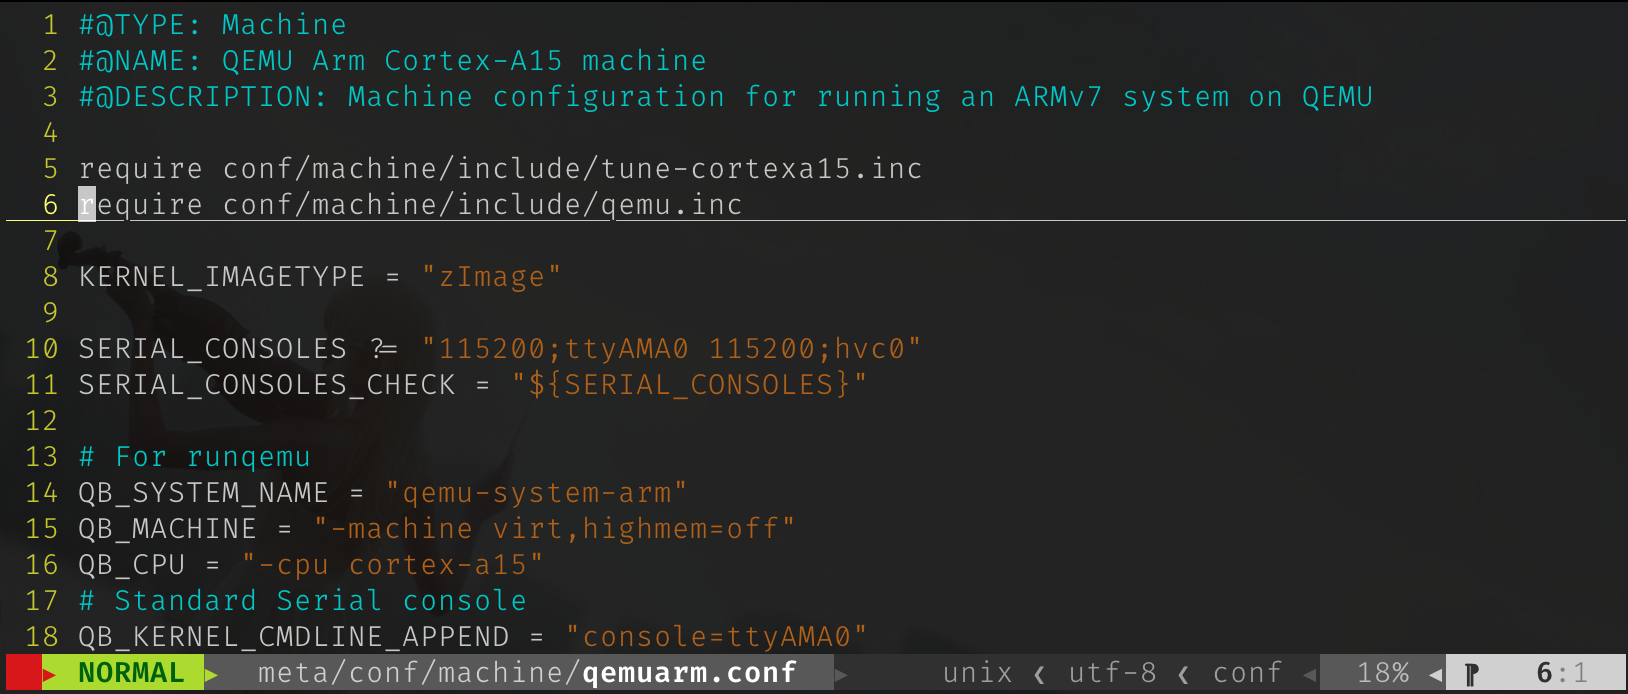
qemuarm.conf
在 qemuarm.inc:22 ,我們看到它是配置為 linux-yocto
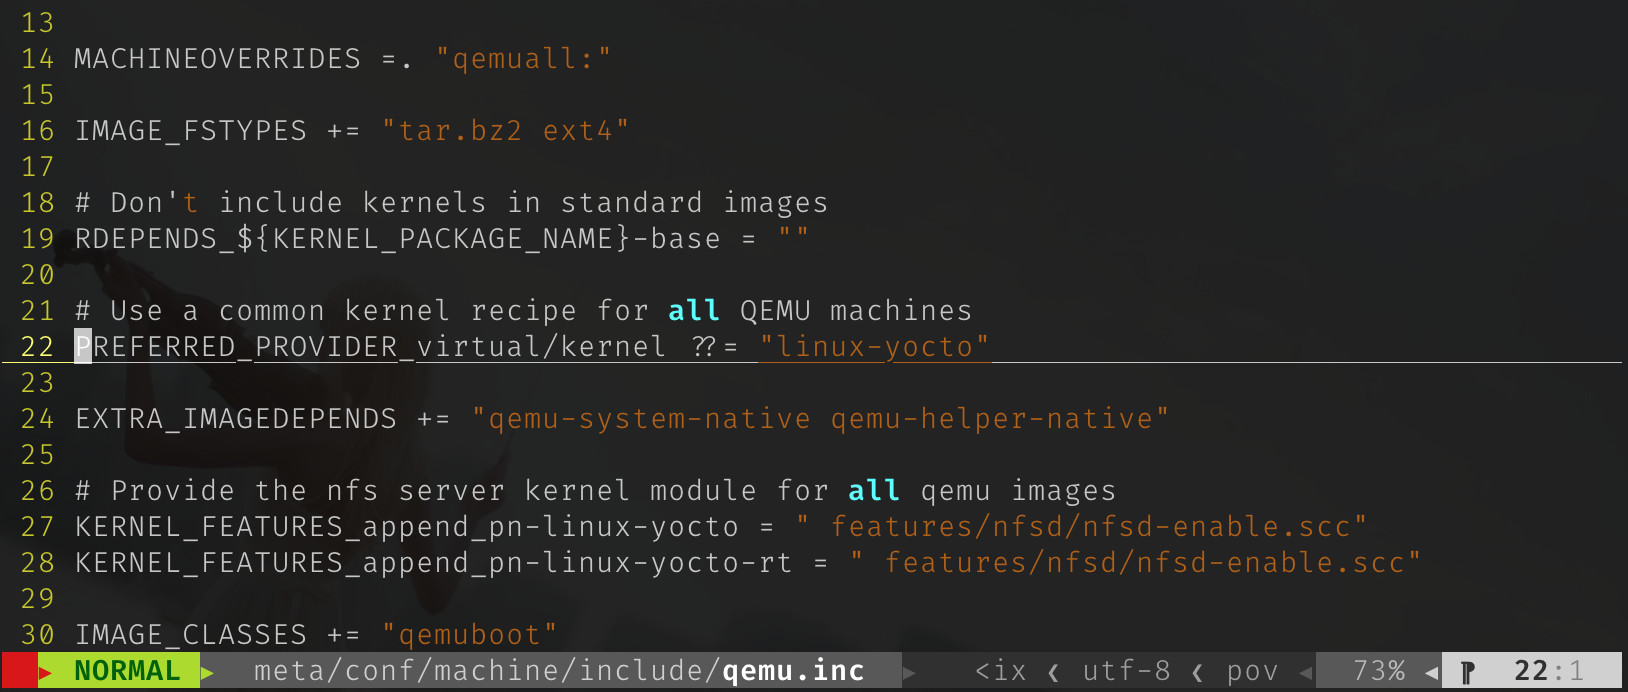
qemuarm.inc
接下來就是要去找到 linux-yocto 它的配置檔在哪裡了。
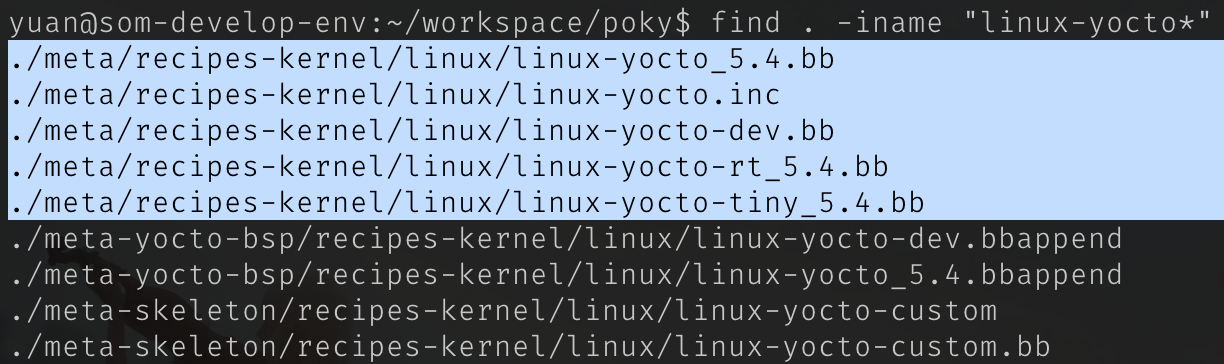
通常它會被放在 recipes-kernel/linux 中,但我們還是可以直接以搜尋的方式找到它。
1find . -iname "linux-yocto*"
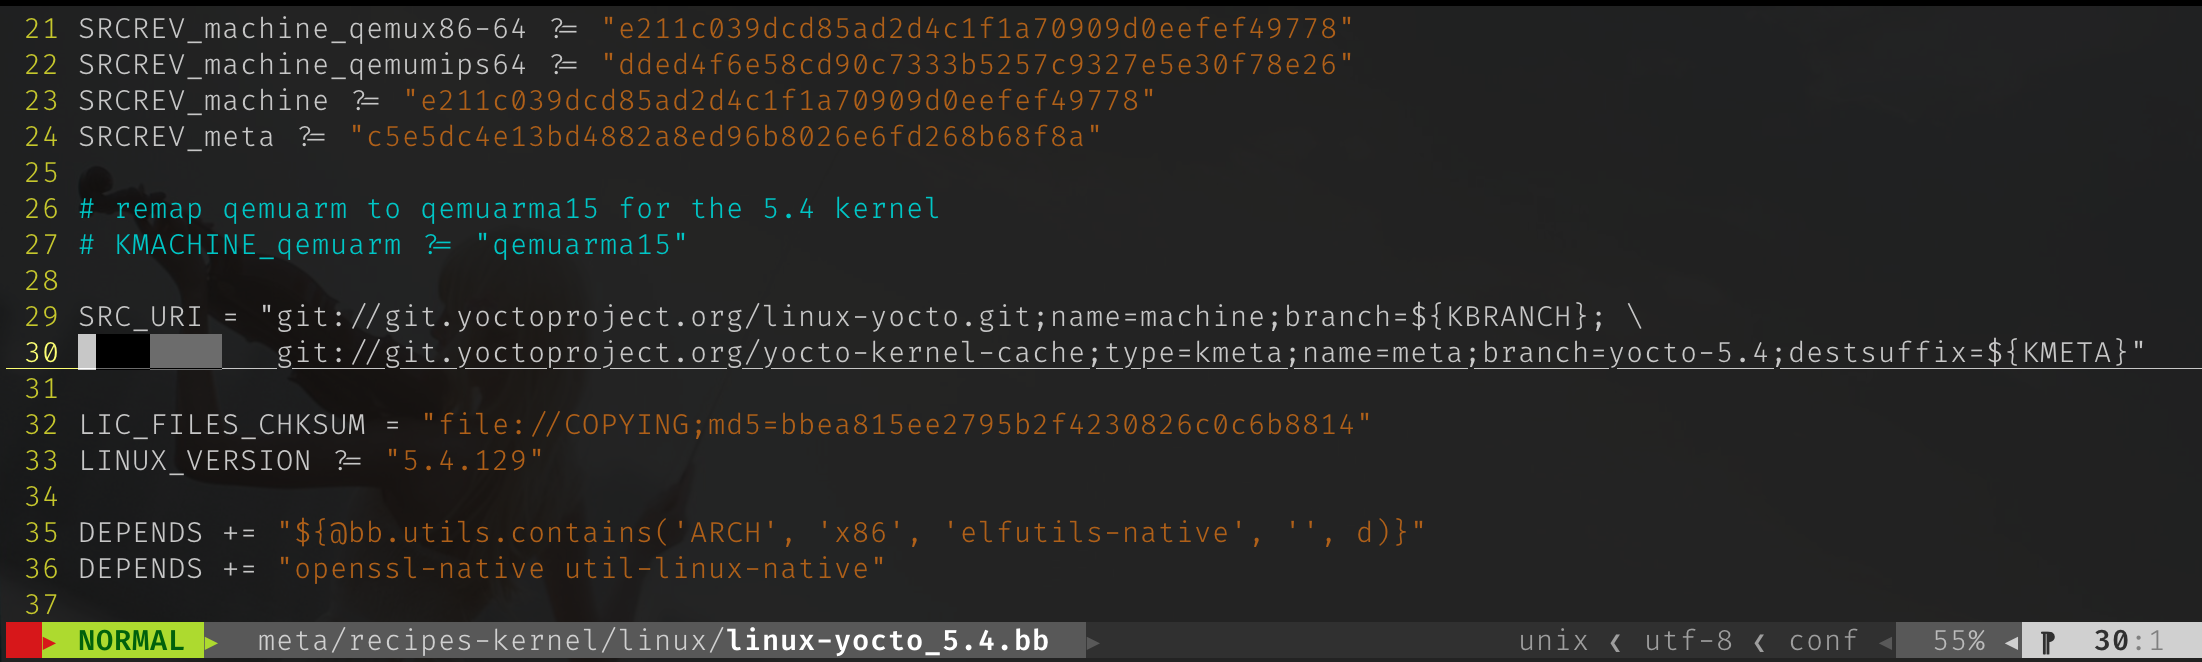
最後我們可以看 SRC_URL 所指定的位置,即是 Kernel 的來源。
呼喚出熟悉的畫面
1bitbake virtual/kernel -c menuconfig

製作 Configuration Fragment
執行下列指令來產生 configuration fragment。產生的檔案會放置在 ${WORKDIR}/fragment.cfg。
而 ${WORKDIR} 的位置可參考手冊中註明的位置: ${TMPDIR}/work/${MULTIMACH_TARGET_SYS}/${PN}/${EXTENDPE}${PV}-${PR}。
1bitbake virtual/kernel -c diffconfig
2
3# 把透過 diffconfig 產生的 fragment.cfg 移過來
4mv tmp/work/qemuarm-poky-linux-gnueabi/linux-yocto/5.4.129+gitAUTOINC+c5e5dc4e13_dfb9647332-r0/fragment.cfg my-local-version.cfg
從內容應該可以看出來,筆者只有修改了 local version 而已。
1CONFIG_LOCALVERSION="-yuan"
接下來我們可以透過 recipetool 幫我們將 my-local-version.cfg 加入我們的 Layer中。
1recipetool appendsrcfile meta-first-layer linux-yocto my-local-version.cfg
重新編譯 kernel
1bitbake virtual/kernel
2
3# 重新編譯 Image
4bitbake core-image-minimal
使用 qemu 進行驗證
1runqemu qemuarm core-image-minimal nographic slirp
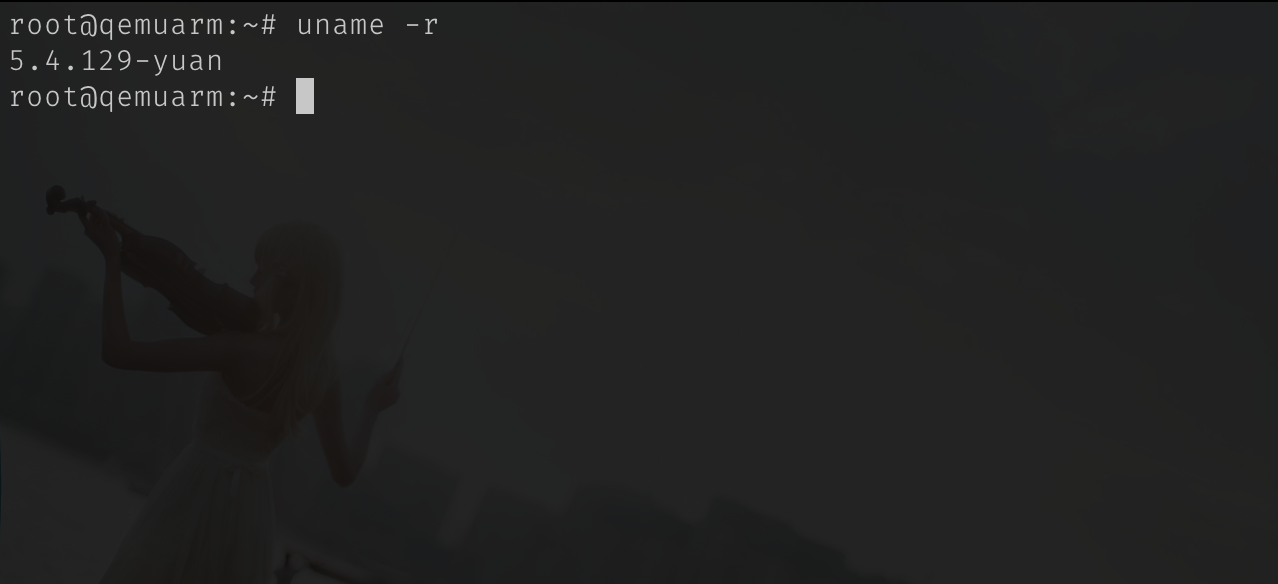
修改 LOCALVERSION 之後的結果
寫在最後
筆者在驗證修改 LOCALVERSION 是否有修改成功時,返覆的使用下列指令進行確認。 但時常會沒有修改成功。
1bitbake linux-yocto -c kernel_configme -f
2bitbake linux-yocto -c kernel_configcheck -f
若有發現原因,會再進行補充。
補充說明
如果在執行 bitbake virtual/kernel -c menuconfig 遇到了下列錯誤,可以安裝 screen 或是 tmux 來解決此問題。
tmux split-window -c “{cwd}” “do_terminal”
tmux new-window -c “{cwd}” -n “linux-imx Configuration” “do_terminal”
xfce4-terminal -T “linux-imx Configuration” -e “do_terminal”
terminology -T=“linux-imx Configuration” -e do_terminal mate-terminal –disable-factory -t “linux-imx Configuration” -x do_terminal
konsole –separate –workdir . -p tabtitle=“linux-imx Configuration” -e do_terminal
gnome-terminal -t “linux-imx Configuration” – do_terminal
xterm -T “linux-imx Configuration” -e do_terminal
rxvt -T “linux-imx Configuration” -e do_terminal
tmux new -c “{cwd}” -d -s devshell -n devshell “do_terminal”
screen -D -m -t “linux-imx Configuration” -S devshell do_terminal
安裝方式:
1sudo apt install -y tmux
小結
在 Yocto 環境中調整 Kernel 其實是有許多方法的,例: 使用自己指定的 Kernel Source、使用我們給定的 defconfig,或是使用 patch 等。
而我們此次是透過給予 Configuration Fragments 的方式進行。
未來若有使用到其他方式,會再額外撰寫記錄。